☕ Quick jump: what I'd want to know
I've watched a lot of people pour water. That's a weird thing to say, I know. But after years of running a small coffee bar and teaching home brewing classes, I can tell you: the difference between a good cup and a great one often comes down to the kettle. This gooseneck kettle guide isn't about fancy gear. It's about the pour — and the tool that gives you control.
Most people buy a gooseneck kettle, fill it with water, and start dumping. Then they wonder why their pour-over tastes muddy or weak. The spout does its job. The user doesn't. Let's fix that.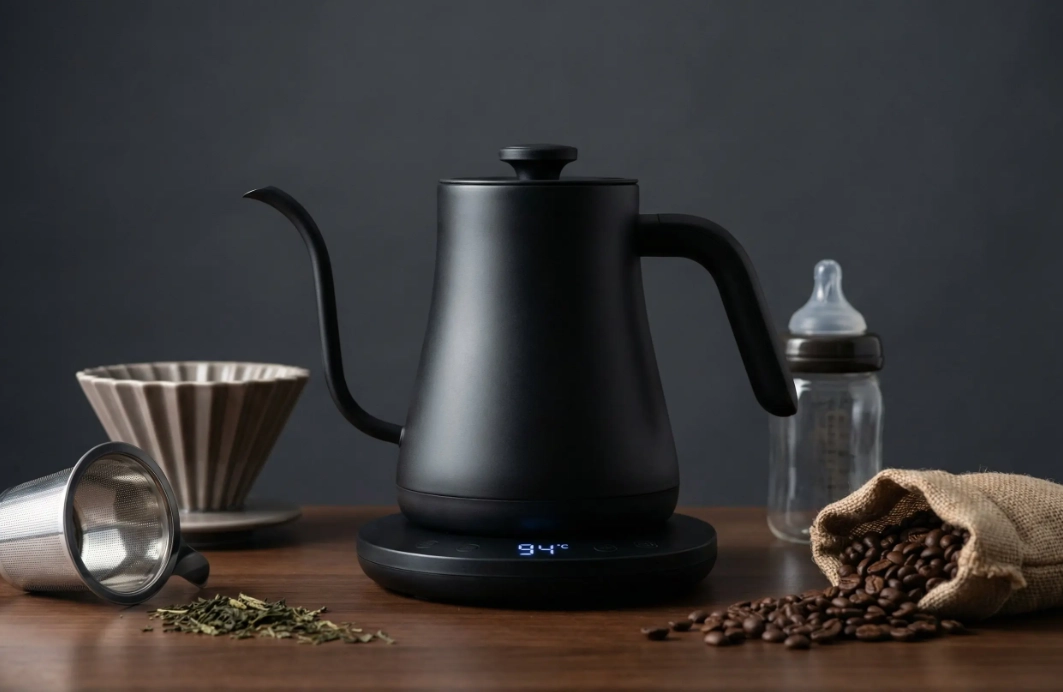
What Is a Gooseneck Kettle (And Why Bother)?
A gooseneck kettle has a long, slender, curved spout. That shape isn't decoration. It slows the water down and narrows the stream into a steady, controllable flow. With a regular kettle, you get a gush. With a gooseneck, you get a line you can aim.
Why does that matter? Coffee extraction is finicky. Pour too fast, and water rushes past the grounds without picking up flavor. Pour unevenly, and you get channeling — where water finds a single path through the coffee bed and leaves dry patches. A gooseneck spout lets you pour in slow circles, saturating everything at the same rate.
I remember my first pour-over attempt with a standard kettle. The water flooded the filter, the bed collapsed, and the cup tasted like cardboard. Switching to a gooseneck didn't magically make me a barista, but it removed one major variable. That's the point.
The non-consensus bit: Many guides tell you to buy a gooseneck kettle with a built-in thermometer. Unless you're brewing light-roast single origins that demand precision, skip it. A separate instant-read thermometer gives you more flexibility and costs less. I've seen too many beginners obsess over the kettle's dial while ignoring their grind size — which matters ten times more.
How to Use a Gooseneck Kettle Without Wrecking Your Brew
You've got the kettle. Now what? Here's the routine I walk every student through.
Step 1: Preheat the kettle and the filter. Fill your kettle with water, bring it to a boil, then rinse your paper filter with hot water. This removes papery taste and warms your carafe. Dump the rinse water. Don't skip this — it's the cheapest upgrade to cup quality.
Step 2: Let the water cool to the right temp. For dark roasts, aim for about 90°C (194°F). Medium roasts: 92–94°C (198–201°F). Light roasts: 96°C (205°F) or just off boil. No thermometer? Boil, then wait 30 seconds for every degree below boiling you need. It's rough, but it works.
Step 3: Bloom first. Pour just enough water to wet the grounds — about twice the coffee's weight. If you're using 20g of coffee, pour 40g of water. Wait 30–45 seconds. You'll see bubbles and swelling. That's CO2 escaping. Skipping the bloom leaves gas in the bed, which blocks water from reaching the coffee. I see this mistake constantly.
Step 4: Pour in slow, steady circles. Start at the center, spiral outward, then back in. Keep the spout low — about 5–8 cm above the bed. Pouring from high up introduces agitation and uneven extraction. A good pour takes 2–3 minutes total for a standard 300ml brew. If you're done in 30 seconds, you're pouring too fast. If it takes 6 minutes, your grind is too fine.
Step 5: Don't scrape the sides. Water hitting the filter walls bypasses the coffee entirely. Keep the stream centered on the bed.
Choosing the Right Gooseneck Kettle: What Actually Matters
Walk into any coffee gear shop and you'll see dozens of options. Most are fine. Some are better. Here's how I break it down.
| Feature | What to look for | Why it matters (from my experience) |
|---|---|---|
| Spout shape | Narrow, tapered, with a slight curve | A wide spout defeats the purpose. I tested a cheap kettle with a spout that flared at the tip — it dribbled. Look for a uniform diameter. |
| Capacity | 0.8–1.0 liter | Bigger kettles are heavy when full and hard to control. Smaller ones require refilling mid-brew. One liter is the sweet spot for two cups. |
| Handle material | Heat-resistant plastic or silicone-wrapped metal | Metal handles get hot. If you're brewing multiple cups, you'll feel it. I learned this the hard way with a bare stainless handle. |
| Gooseneck angle | 60–75 degrees from the base | A steeper angle gives better precision. A too-shallow spout forces you to tilt the kettle awkwardly, which tires your wrist. |
| Variable temperature control | Optional for most; essential for light roasts | I use a stovetop gooseneck at home because I like the ritual. But for quick, repeatable brews, an electric gooseneck with temperature presets saves time and reduces guesswork. |
Do you need an electric gooseneck kettle? Not necessarily. Stovetop versions work fine and cost less. But they require you to monitor temperature separately. If you're brewing the same coffee daily and want consistency, electric is worth the extra counter space. If you're experimenting with different beans and temps, a stovetop kettle plus a thermometer gives you more control.
Mistakes I See Every Week (And How to Avoid Them)
During workshops, I watch people's hands. The kettle is a tool, but it's also an extension of your wrist. Here are the patterns that ruin brews:
Holding the kettle by the very top of the handle. This gives you leverage but sacrifices stability. Hold closer to the body of the kettle. Your pour will be steadier. I've seen this fix alone improve someone's extraction noticeably.
Pouring too fast from the start. The first pour should be gentle. If you hit the bed with force, fines migrate to the bottom and clog the filter. Start with a soft, slow stream and build up.
Stopping and starting mid-pour. Each time you stop, the bed settles and compacts. Then the next pour disturbs it unevenly. Practice continuous, steady pouring. It takes time. I still occasionally catch myself pausing.
Using a gooseneck kettle for French press or immersion methods. Those methods don't need precision pouring. Save the gooseneck for pour-over, Chemex, or drip. I've seen people get frustrated when their gooseneck doesn't improve their French press — it's the wrong tool for the job.
My take on price: You don't need a $150 kettle. A $30 stovetop gooseneck from a reputable brand will serve you well for years. The expensive ones offer better temperature control and build quality, but they won't magically make better coffee. Buy the cheap one, learn to pour, then upgrade if you find yourself brewing daily and craving consistency.
Straight Answers to Real Questions
Fact-checked by our editorial team. All product experiences are based on hands-on testing and years of brewing in a home kitchen and a small coffee bar.
Reader Brew Notes